Quote:
Originally Posted by BrucePerens

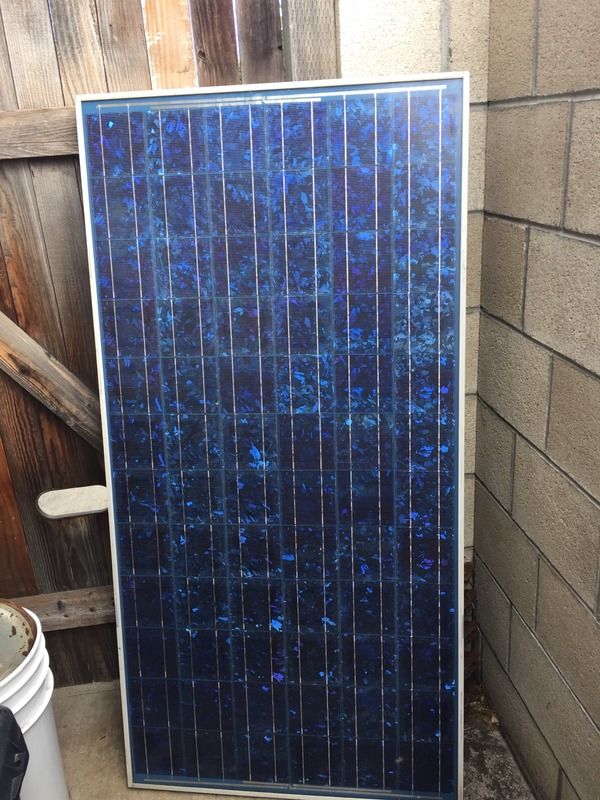
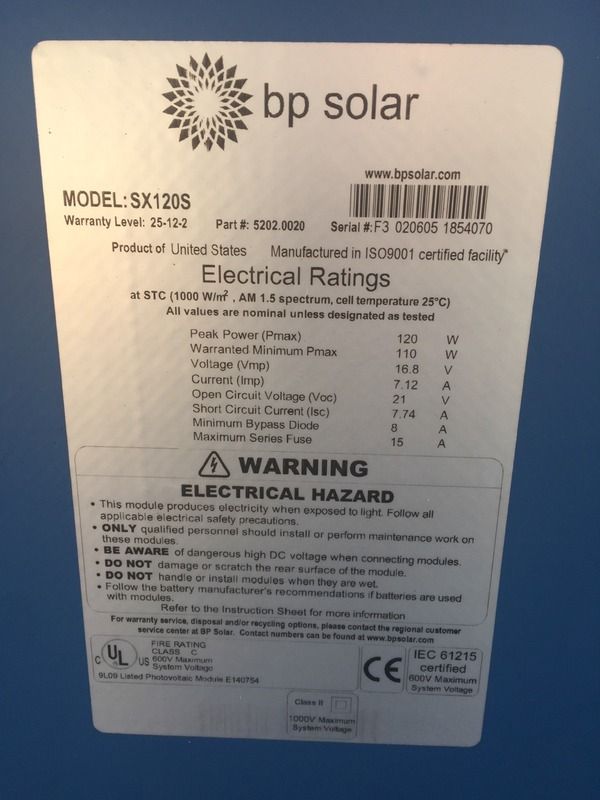
One 16.8V panel might be a bit too low voltage to charge your battery reliably. The required charge voltage for a 12V battery is very close to what this panel puts out in optimal conditions only, especially considering voltage drops in the wires and controller. Two in series will work much better. Brand new panels of similar power rating cost as little as $100 but you shouldn't wire this one to any new panel, only to one that matches its current rating approximately.
|
Bruce know a lot about electrical stuff, but I have other opinions WRT this particular project.
The voltage requirement at the TM Battery Bank is only about 14.4V. If we assume that age has "worn down" panel performance by a bit, we're probably still good, somewhere above 16V. The wiring distances and wire gauge are the most important remaining factor. I don't know the mounting point and resulting wire distance you have in mind, but most TM installations are built using #10 cable (and some people have used bigger stuff than that). Use an online calculator to determine your losses.
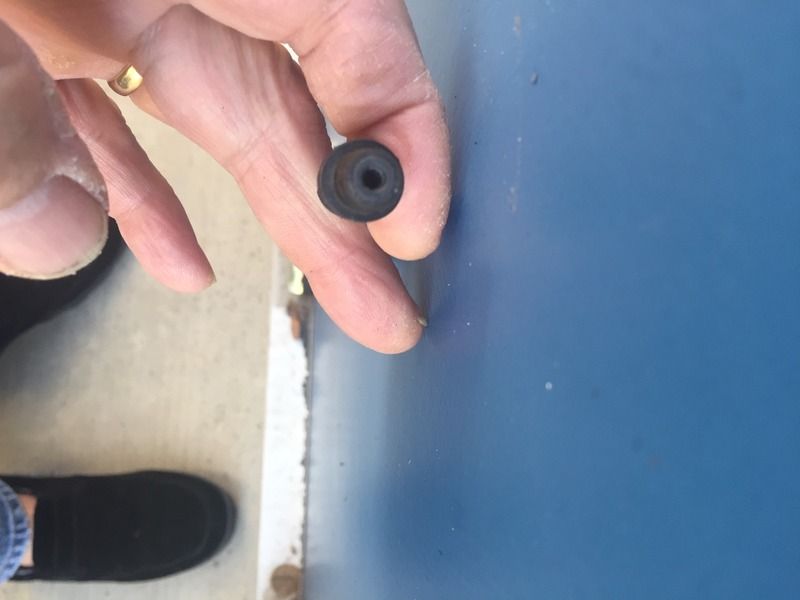
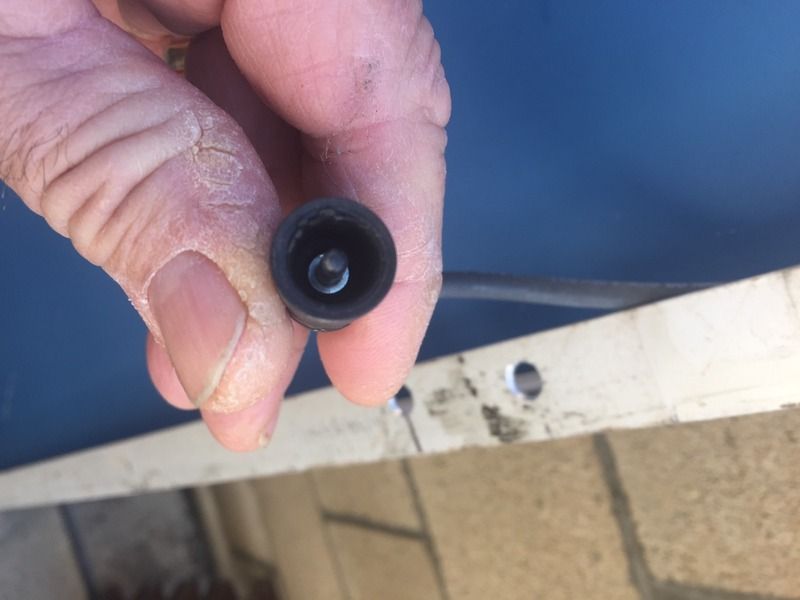
For cable from the panel to the Solar Controller, you can buy a double-length "solar extension cable" with male and female MC-4 connectors on the two ends, then cut in the middle. The MC4 "ends" go the to new connectors on the panel leads, while the "cut" ends connect into the charge controller terminals. (The reason you buy a solar extension cable, rather than visit a big-box hardware store, is the high UV resistance and quality of insulation within the "Solar Cable".)
Quote:
Originally Posted by BrucePerens
You can just cut off the connector and permanently wire to a cheap PWM controller like this one on Amazon. |
I don't like this idea (skipping the weatherproof MC4 connectors), and I don't like the controller, either (for different reasons). MC-4 Connectors are designed for outdoor use and connect with very solid clamps, while cutting and splicing loose wire ends might be less reliable (with the non-MC-4 assembly maybe wrapped by electrical tape, which could start to flap in the wind after a few hundred miles of highway travel). I may be wrong, but non-standard connections seem more likely to fail in some way, loosening up (more resistance) or leaking power into the TM roof. The connectors cost next to nothing, and they're easy to assemble. A single set of these, for barely a dollar, would do the job:
http://www.ebay.com/itm/Sodial-R-MC4...S/172204296563
Second, I don't see that particular controller advertising negative ground/common. The cheapest PWM controllers tend to be positive-ground, and charging the negative-ground Trailmanor battery bank with a positive ground controller can act wonky, and fail to deliver much power. (My first PWM controller had such "wonkiness", and I had to throw it away.)
Negative-Ground PWM controllers tend to cost much more. The lowest price I see is a Renogy "open box" return item called the "Wanderer",
https://www.renogy.com/renogy-wander...-box-like-new/.
You will also need panel mounts (so-called "Z bracket", with flat bottoms). Maybe buy from Renogy at the same time as the controller (and save some shipping charges). You DON'T screw the panel mounts down, you use double-sided VHB tape to avoid piercing the TM roof. VH-B is readily found on Ebay.
Total costs, above and beyond the panel:
$50 for the controller (includes shipping).
$10 for the set of Z-brackets (you don't need any screws).
$5 (or less) for MC-4 connectors.
$25 for weatherproof solar cable (the "extension cable" to be cut in half).
$5-10 for double-sided 3M VHB tape.
And also recommended:
About $20 for a few plastic "cable channels" from a big box store (both straights and corners). As with the "extension cable", your cost depends on your mounting location and length of exposed cable run. You can stick them down using more VHB tape. Don't buy "adhesive-backed" channels, (the adhesive isn't very good, it's only intended for indoor use).
Have fun!


 Hybrid Mode

